개발하는 과정에서 목업 데이터의 중요성과 필요성에 대해서는 다들 공감 하실 겁니다. 클라이언트와 서버간 혹은 마이크로 서비스로 구축된 서비스 간 통신을 하기 위해 어떤 데이터를 주고 받을지 협의 하고 개발을 진행하게 될텐데, 각자 개발에 필요한 기간과 난이도가 다르기 때문에 API 서버가 준비되기 위해 시간이 소요되죠. 하지만 그렇다고 상대방이 API 서버를 준비해 줄 때까지 기다리고 있을 순 없습니다. 그래서 각자 주고 받기로 한 데이터에 맞는 목업 데이터를 만들어서 개발을 진행하게 되죠.
하지만 다양한 이유로 서로 간 맞춰 두었던 스펙들은 변하기 마련이고, 이 때 마다 목업 데이터 역시 변경해야 할 겁니다. 그런데 이런 목업 데이터를 제공해 주는 API 서버가 있고, 스펙 변경도 손쉽게 할 수 있다면 어떨까요? 똑같은 API 서버이기 때문에 개발 할 때는 목업 데이터를 제공해 주는 API를 바라보게 하고, API 가 준비 되었다면 엔드포인트만 바꿔 주는 형태로 유연하게 대응할 수 있기 때문에 목업 데이터를 사용하는 것보다 더 효율적으로 개발할 수 있을 겁니다. 그래서 이번 글에서는 목업 API 서버를 간편하게 만들 수 있는 mockit (https://github.com/boyney123/mockit) 이라는 오픈 소스를 살펴 보려고 합니다.
mockit 설치 하기
mockit을 설치하기 위해 우분투 인스턴스를 하나 만들어 보겠습니다.

그리고 mockit 이라고 이름 지어 보겠습니다.

mockit은 도커 컨테이너 이미지 형태로 동작하도록 되어 있기 때문에 먼저 mockit 인스턴스에 도커를 설치해 줍니다.
ubuntu@ip-172-31-1-21:~$ sudo apt-get update
Hit:1 http://ap-northeast-2.ec2.archive.ubuntu.com/ubuntu focal InRelease
Get:2 http://ap-northeast-2.ec2.archive.ubuntu.com/ubuntu focal-updates InRelease [114 kB]
Get:3 http://ap-northeast-2.ec2.archive.ubuntu.com/ubuntu focal-backports InRelease [101 kB]
Get:4 http://ap-northeast-2.ec2.archive.ubuntu.com/ubuntu focal/universe amd64 Packages [8628 kB]
Get:5 http://ap-northeast-2.ec2.archive.ubuntu.com/ubuntu focal/universe Translation-en [5124 kB]
... (중략) ...
Get:42 http://security.ubuntu.com/ubuntu focal-security/multiverse amd64 c-n-f Metadata [600 B]
Fetched 19.6 MB in 4s (4442 kB/s)
Reading package lists... Done
ubuntu@ip-172-31-1-21:~$ sudo apt-get install \
>     apt-transport-https \
>     ca-certificates \
>     curl \
>     gnupg \
>     lsb-release
Reading package lists... Done
Building dependency tree
Reading state information... Done
lsb-release is already the newest version (11.1.0ubuntu2).
lsb-release set to manually installed.
... (중략) ...
Setting up curl (7.68.0-1ubuntu2.6) ...
Processing triggers for man-db (2.9.1-1) ...
Processing triggers for libc-bin (2.31-0ubuntu9.2) ...
ubuntu@ip-172-31-1-21:~$ curl -fsSL https://download.docker.com/linux/ubuntu/gpg | sudo gpg --dearmor -o /usr/share/keyrings/docker-archive-keyring.gpg
ubuntu@ip-172-31-1-21:~$ echo \
>   "deb [arch=amd64 signed-by=/usr/share/keyrings/docker-archive-keyring.gpg] https://download.docker.com/linux/ubuntu \
>   $(lsb_release -cs) stable" | sudo tee /etc/apt/sources.list.d/docker.list > /dev/null
ubuntu@ip-172-31-1-21:~$ sudo apt-get update
Hit:1 http://ap-northeast-2.ec2.archive.ubuntu.com/ubuntu focal InRelease
Hit:2 http://ap-northeast-2.ec2.archive.ubuntu.com/ubuntu focal-updates InRelease
Hit:3 http://ap-northeast-2.ec2.archive.ubuntu.com/ubuntu focal-backports InRelease
... (중략) ...
ubuntu@ip-172-31-1-21:~$ sudo apt-get install docker-ce docker-ce-cli containerd.io
Reading package lists... Done
Building dependency tree
Reading state information... Done
The following additional packages will be installed:
  docker-ce-rootless-extras docker-scan-plugin pigz slirp4netns
Suggested packages:
  aufs-tools cgroupfs-mount | cgroup-lite
The following NEW packages will be installed:
  containerd.io docker-ce docker-ce-cli docker-ce-rootless-extras docker-scan-plugin pigz slirp4netns
0 upgraded, 7 newly installed, 0 to remove and 86 not upgraded.
Need to get 104 MB of archives.
After this operation, 448 MB of additional disk space will be used.
Do you want to continue? [Y/n]  Y
Get:1 http://ap-northeast-2.ec2.archive.ubuntu.com/ubuntu focal/universe amd64 pigz amd64 2.4-1 [57.4 kB]
Get:2 http://ap-northeast-2.ec2.archive.ubuntu.com/ubuntu focal/universe amd64 slirp4netns amd64 0.4.3-1 [74.3 kB]
... (중략) ...
Created symlink /etc/systemd/system/sockets.target.wants/docker.socket → /lib/systemd/system/docker.socket.
Processing triggers for man-db (2.9.1-1) ...
Processing triggers for systemd (245.4-4ubuntu3.6) ...
그리고 docker-compose.yml 파일을 이용해서 실행 시킬 수 있도록 docker-compose도 설치해 줍니다.
ubuntu@ip-172-31-1-21:~$ sudo curl -L "https://github.com/docker/compose/releases/download/1.29.2/docker-compose-$(uname -s)-$(uname -m)" -o /usr/local/bin/docker-compose
  % Total    % Received % Xferd  Average Speed   Time    Time     Time  Current
                                 Dload  Upload   Total   Spent    Left  Speed
100   633  100   633    0     0   2167      0 --:--:-- --:--:-- --:--:--  2167
100 12.1M  100 12.1M    0     0  5304k      0  0:00:02  0:00:02 --:--:-- 7245k
ubuntu@ip-172-31-1-21:~$ sudo chmod +x /usr/local/bin/docker-compose
이제 mockit 레포지터리를 다운로드 받습니다.
ubuntu@ip-172-31-1-21:~$ git clone https://github.com/boyney123/mockit.git
Cloning into 'mockit'...
remote: Enumerating objects: 888, done.
remote: Counting objects: 100% (133/133), done.
remote: Compressing objects: 100% (122/122), done.
remote: Total 888 (delta 46), reused 41 (delta 2), pack-reused 755
Receiving objects: 100% (888/888), 29.14 MiB | 18.50 MiB/s, done.
Resolving deltas: 100% (443/443), done.
ubuntu@ip-172-31-1-21:~$ ls -al
total 32
drwxr-xr-x 5 ubuntu ubuntu 4096 Jul 24 13:47 .
drwxr-xr-x 3 root   root   4096 Jul 24 13:40 ..
-rw-r--r-- 1 ubuntu ubuntu  220 Feb 25  2020 .bash_logout
-rw-r--r-- 1 ubuntu ubuntu 3771 Feb 25  2020 .bashrc
drwx------ 2 ubuntu ubuntu 4096 Jul 24 13:42 .cache
-rw-r--r-- 1 ubuntu ubuntu  807 Feb 25  2020 .profile
drwx------ 2 ubuntu ubuntu 4096 Jul 24 13:40 .ssh
-rw-r--r-- 1 ubuntu ubuntu    0 Jul 24 13:42 .sudo_as_admin_successful
drwxrwxr-x 9 ubuntu ubuntu 4096 Jul 24 13:47 mockit
ubuntu@ip-172-31-1-21:~$ cd mockit/
ubuntu@ip-172-31-1-21:~/mockit$
사실 이 상태에서 docker-compose로 애플리케이션을 바로 실행 할 수 있습니다만, 제대로 동작하진 않습니다. 정상적으로 동작하게 하기 위해 docker-compose.yml 파일에서 환경변수 부분을 인스턴스의 IP로 변경해 줍니다. 그리고 나머지 값들은 그대로 둡니다.
ubuntu@ip-172-31-1-21:~/mockit$ cat docker-compose.yml
version: '3'
services:
  mockit-routes:
    image: 'mockit-routes'
    build: 'mockit-routes'
    ports:
      - 3000:3000
    volumes:
      - ./configuration/routes.json:/usr/src/mockit-routes/configuration/routes.json
  mockit-server:
    image: 'mockit-server'
    build: 'server'
    ports:
      - 4000:4000
    volumes:
      - ./configuration/routes.json:/usr/src/mockit-server/configuration/routes.json
  mockit-client:
    image: 'mockit-client'
    build: 'client'
    ports:
      - 5000:3000
    environment:
      - REACT_APP_MOCKIT_SERVER_URL=http://52.78.90.56:3000 # 수정된 부분
      - REACT_APP_MOCKIT_API_URL=http://52.78.90.56:4000    # 수정된 부분
    volumes:
      - ./configuration/routes.json:/usr/src/mockit-client/src/config/routes.json
이제 docker-compose로 mockit을 실행해 보겠습니다.
ubuntu@ip-172-31-1-21:~/mockit$ sudo docker-compose up --build -d
Creating network "mockit_default" with the default driver
Building mockit-routes
Sending build context to Docker daemon  248.8kB
Step 1/9 : FROM node:11.4.0-alpine
11.4.0-alpine: Pulling from library/node
4fe2ade4980c: Pull complete
... (중략) ...
Successfully built 064a6fef3796
Successfully tagged mockit-client:latest
Creating mockit_mockit-routes_1 ... done
Creating mockit_mockit-client_1 ... done
Creating mockit_mockit-server_1 ... done
실행이 완료되면 브라우저를 통해서 인스턴스 IP에 포트 5000번으로 접근해서 아래와 같은 화면을 만날 수 있습니다.
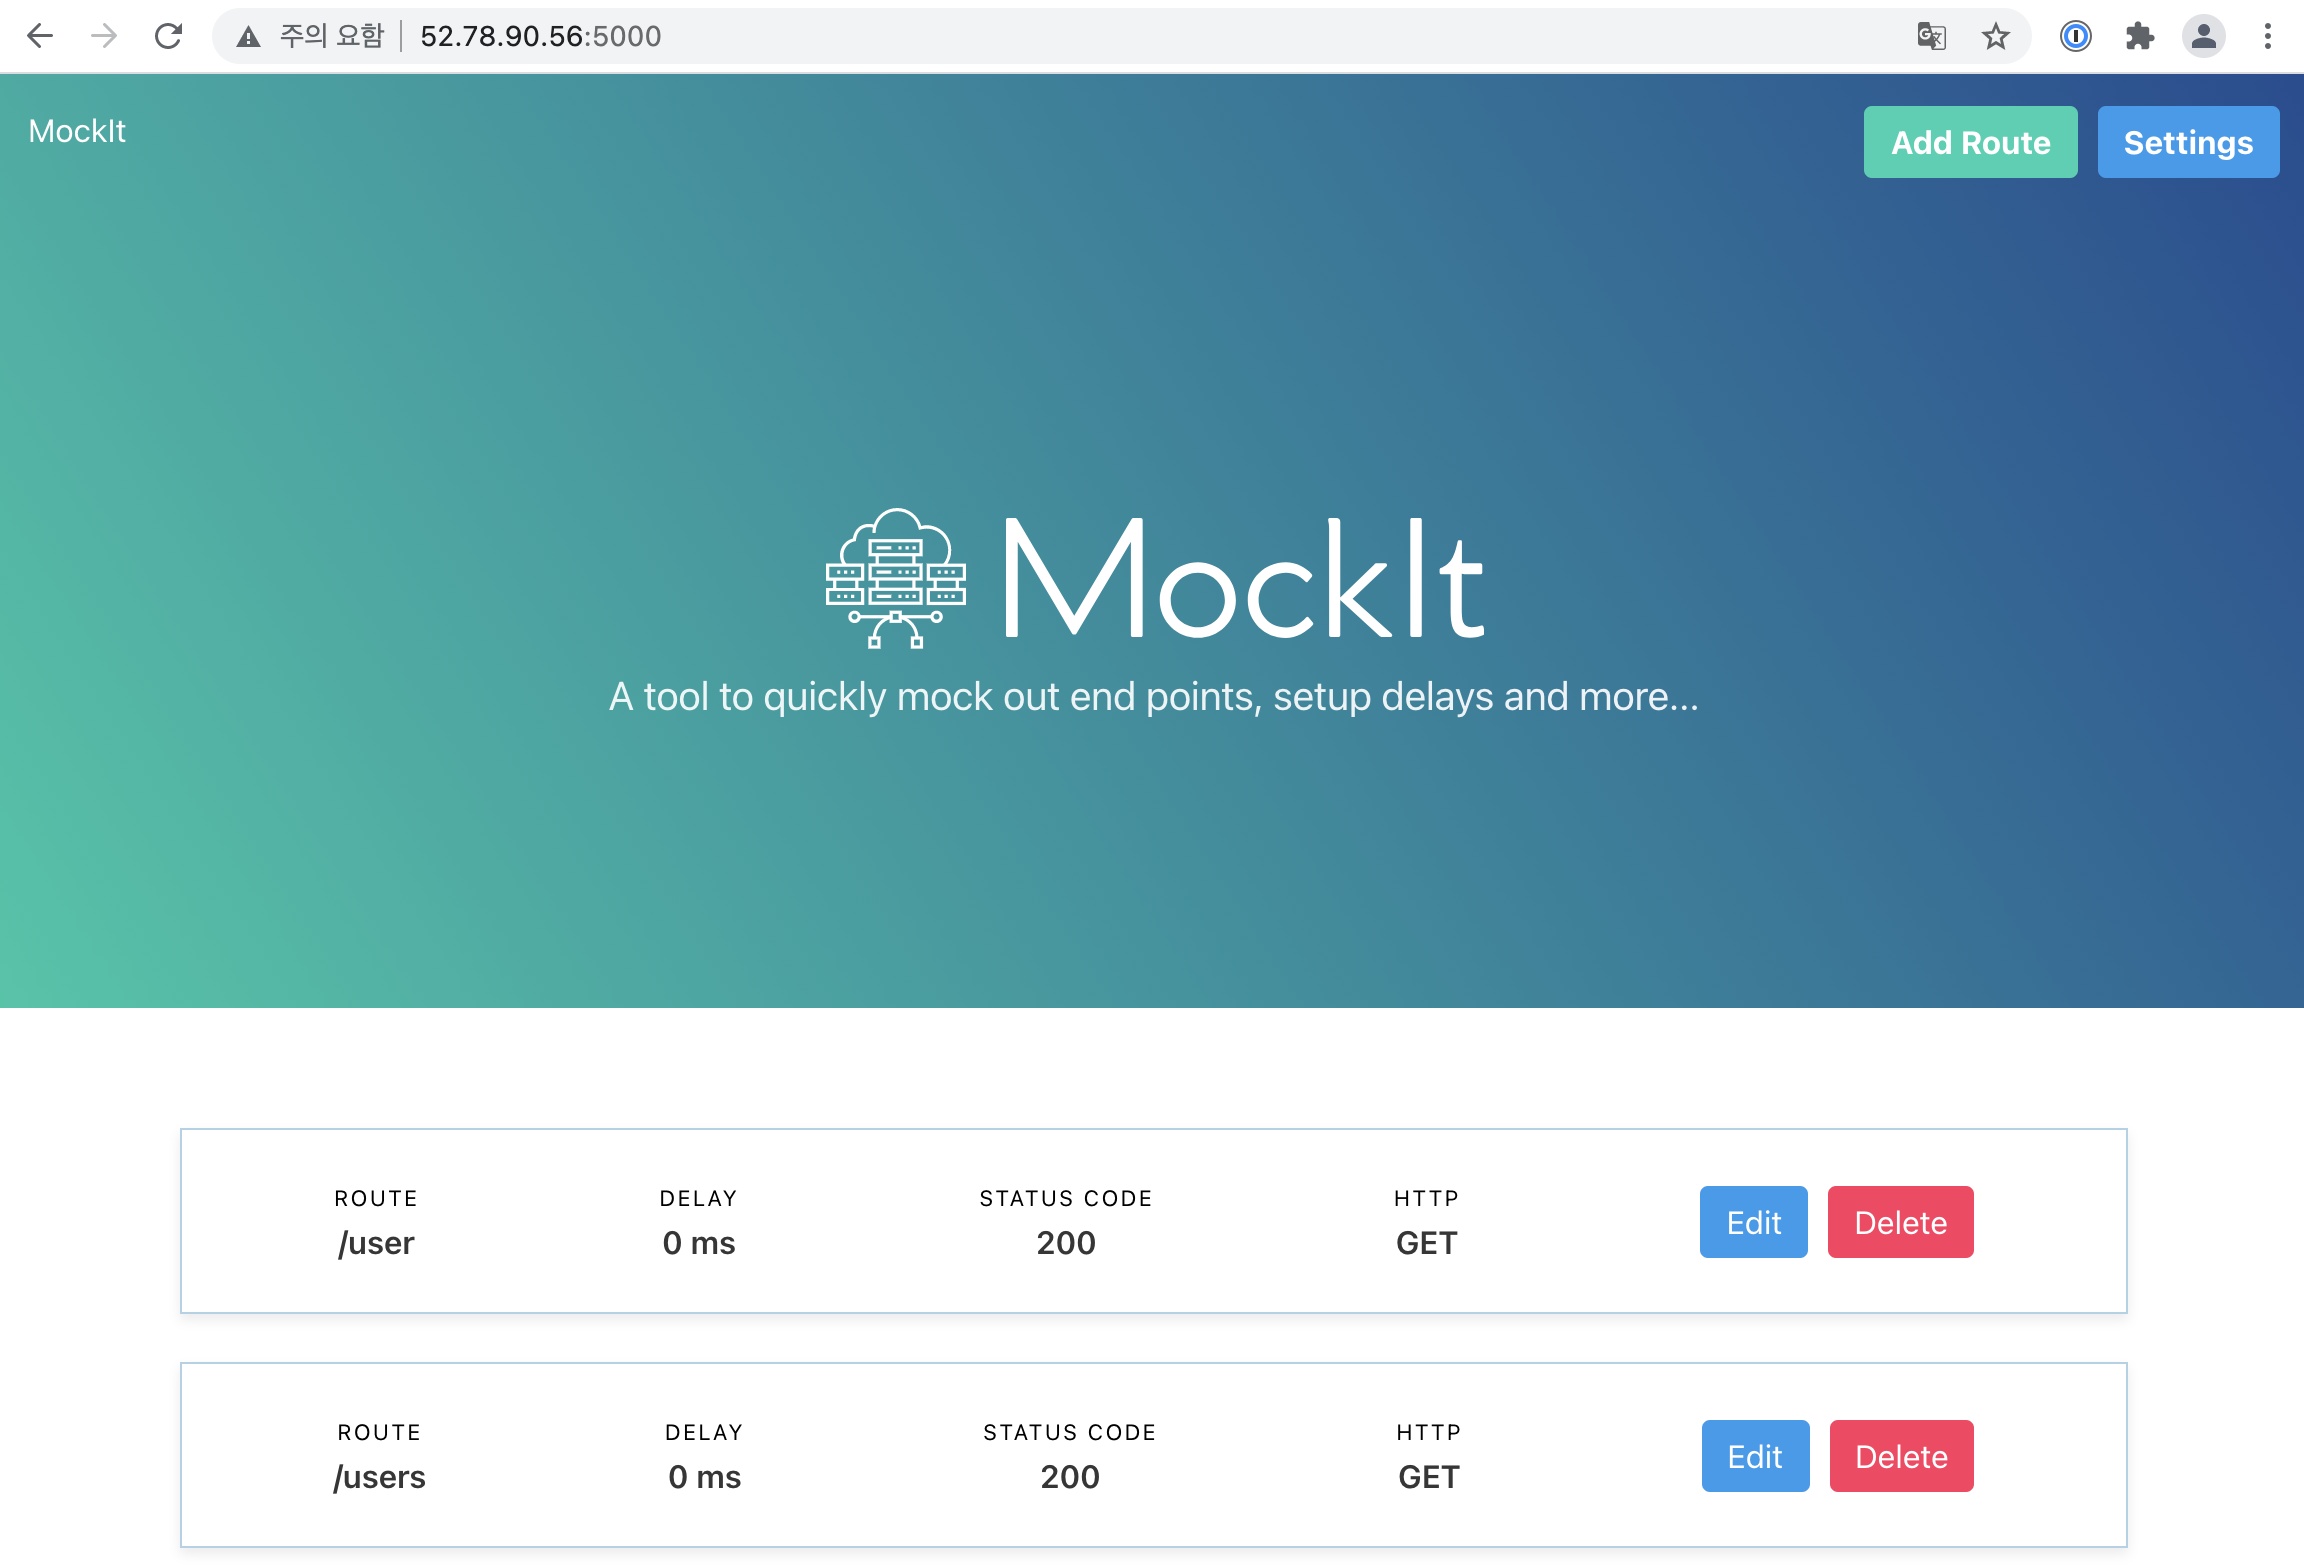
네, 이게 끝입니다. 설치가 완료 되었습니다. 이제 사용하면 됩니다.
mockit 사용하기
목업 API 서버로서 사용하기 위해서는 3000번 포트로 요청을 보냅니다. 예제로 들어가 있는 API 엔드포인트는 /user와 /users 입니다.
❯ curl http://52.78.90.56:3000/user
{"name":"Jermain Spinka","username":"Agnes71","email":"Taurean.Huels55@hotmail.com","address":{"street":"Kihn Inlet","suite":"Apt. 784","city":"South Doraside","zipcode":"91828","geo":{"lat":"-56.8426","lng":"-122.9710"}},"phone":"810-578-0341","website":"jewell.name","company":{"name":"Quitzon, Wilderman and VonRueden","catchPhrase":"Realigned zero administration encoding","bs":"robust incubate synergies"}}
그리고 대시보드를 통해서 목업 API의 경로들을 추가할 수 있습니다. 새롭게 /mock 이라는 경로를 추가해 보겠습니다. 대시보드로 들어가서 우측 상단에 있는 Add Route 버튼을 클릭 합니다.

보시는 스크린샷과 같이 /mock 라는 경로는 JSON 형태의 응답을 내려주게 해 두었습니다. Save changes 버튼을 눌러서 저장한 후 curl 명령으로 테스트 해보면 정상적으로 동작하는 것을 볼 수 있습니다.
❯ curl http://52.78.90.56:3000/mock
{"key":"mock","value":"work"}
그럼 이렇게 저장한 데이터들은 어디에 저장 될까요? docker-compose.yml 파일을 열어 보셨다면 아시겠지만 volumes 설정을 통해서 호스트에 환경 설정 파일 생성하고 컨테이너에서 이 파일을 마운트 해서 사용 합니다. 그리고 경로에 변경이 생기면 바로바로 파일에 쓰기를 합니다. 그래서 ./configuration/routes.json 파일만 살아 있다면 컨테이너를 내렸다가 다시 올려도 경로 정보들이 유지 됩니다. 실제로 파일을 열어 보면 우리가 방금 추가한 /mock 경로가 기록되어 있는 것을 볼 수 있습니다.
ubuntu@ip-172-31-1-21:~/mockit$ cat configuration/routes.json
{
    "settings": {
        "features": {
            "chaosMonkey": false,
            "cors": true,
            "authentication": false,
            "groupedRoutes": false
        },
        "authentication": {
            "username": "test",
            "password": "test"
        }
    },
    "routes": [
        ... (중략) ...
        {
            "id": "61b4aaa9-bbe9-4cfc-80ee-3d8528a218e6",
            "route": "/demo",
            "httpMethod": "GET",
            "statusCode": "200",
            "delay": "0",
            "payload": {
                "message": "hello"
            }
        },
        {
            "id": "4c17aef2-5f3b-4fc7-9cda-581dadb31d3c",
            "route": "/mock",
            "httpMethod": "GET",
            "statusCode": "200",
            "delay": "0",
            "payload": {
                "key": "mock",
                "value": "work"
            },
            "headers": []
        }
    ]
}
마치며
오늘은 mockit 이라는 오픈소스를 통해서 간단하게 목업 API 서버를 구성하는 방법에 대해서 살펴 봤습니다. AWS 환경에서 목업 API 서버를 구성한다면 ALB를 앞단에 두어서 목업 API 서버이지만 https를 사용할 수 있게도 구성할 수 있을 겁니다. 그리고 routes.json 파일의 주기적인 백업을 통해서 목업 API의 설정을 유지할 수도 있습니다.
mockit에는 오늘 살펴본 기능 외에도 특정 헤더를 추가하거나 인증을 목업 하거나 하는 등등의 기능도 사용할 수 있습니다. 이번 글에서 다룬 것처럼 꼭 인스턴스에 올리지 않고 로컬 노트북에 올려도 잘 동작하기 때문에 부담없이 설치해 볼 수도 있습니다. mockit 이 여러분의 개발 생산성 향상에 도움이 되기를 바랍니다. 감사합니다.
광고 하나만!
https://festa.io/events/1700?fbclid=IwAR3MYffBl0Gur9ur36eEayZfj7MG4IuxZaMk81kRvXY4aKGlqR91LaSWZ3I
당근페이 초기 정예 개발자 채용설명회 | Festa!
Festa에서 당신이 찾는 이벤트를 만나보세요.
festa.io
'IT > DevOps' 카테고리의 다른 글
| 패킷 덤프를 통해 확인하는 ALB와 NLB의 차이점 (2) - NLB 동작 원리 (8) | 2021.08.08 |
|---|---|
| AutoScalingGroup의 Scheduled action 활용하기 (1) | 2021.08.06 |
| 패킷 덤프를 통해 확인하는 ALB와 NLB의 차이점 (1) - ALB 동작 원리 (4) | 2021.08.05 |
| jib 이용 시 자바 에이전트 추가하기 (0) | 2021.07.31 |
| jib를 이용한 자바 앱 컨테이너화 (7) | 2021.07.23 |